British Infantry Painting Guide for Bolt Action
A few years ago I decided to get into Bolt Action. Naturally since I was a big British player in in Flames of War with the British, I decided to buy in with the basic starter box. Move ahead several more years and my painting backlog finally cleared to the point where I could make a start. I've already done a two part Youtube video series on how I went about painting it, but it occurs to me that I may have been a bit too... inarticulate with my description of the painting process. Since I'm way better with the written word rather than the spoken word I've decided that I'll start going into detail on this blog about the colours, techniques, and methods that I use to achieve my results. I planned this process to achieve a middling level paint job due to quantity of these figures that I intend to get through. This means that I won't be hitting some of the extreme details to a perfect level of accuracy. Given the occasionally soft detail on the Warlord Games plastics, this is perfectly reasonable.
The British Infantryman - 1944
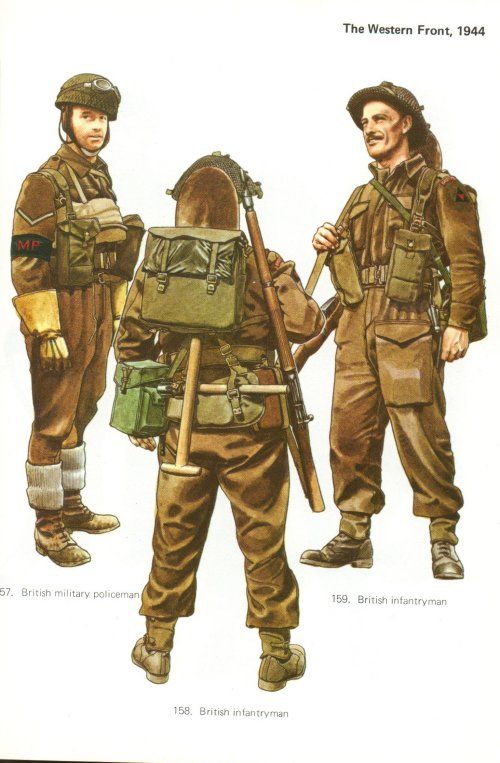
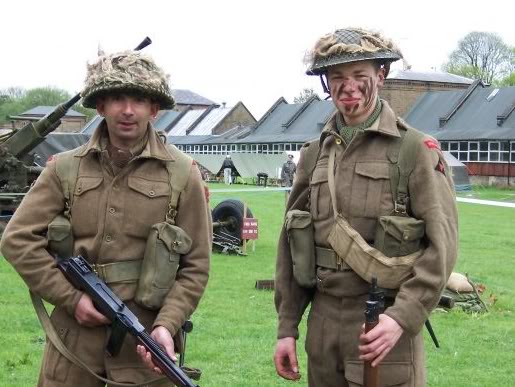
The dress of the British soldier of this period typically consists of a green-brown uniform jacket and trousers, a canvas belt kit that varied in colour from a khaki to a very pale green, and the iconic "Brodie" helmet, frequently worm with netting to break up it's distinct outline. In terms of small arms, the British soldier typically carried the Small Lee Enfield No 4. as the standard infantry armament and the Mills Bomb as the standard issue hand grenade. Most sections were also equipped with one to two Bren Light Machine Guns, and NCOs occasionally carried Sten Submachine Guns. In terms of heavier firepower at the platoon level, the British used a small 2 inch mortar to both lay down smoke and drop high explosive shells. This weapon was typically used to pin and destroy entrenched positions such as machine gun nests. In terms of anti-tank firepower, each platoon was usually issued a single PIAT, a direct fire spigot mortar that launched a shape charge warhead designed for penetrating armour plate. Like most allied infantry carried anti-tank weaponry it was inferior to the German equipment, but the PIAT also had the unique ability to be used in enclosed spaces without back blast, making it ideal for urban warfare. British infantry, like almost all of their contemporaries of the era, fought in teams of ten to twelve men, called a Section in British terminology. In the field a section would occasionally split into a fire and a maneuver elements of five to six men while in battle, though in all other times this was as small as a fighting formation typically was. As usual, first step before any paint hits the model is to do some quick googling to get some reference photos.
Stage 1 - Assembly, Preparation and Priming
First stage is to decide what role the model will fulfill within your force. This is relevant to selecting what weapons the model should carry. Section leaders must, and some officers may, typically carry a Sten SMG. If you are Assembling a Bren gunner, one of pouches on the sprue is a spare barrel and tool bag. Typically even LMG teams were usually two to three men. One man carried the gun while the other carried spare ammunition and the spare barrel. Giving this tool bag to a regular rifleman to represent the assistant gunner should be fairly accurate. As for what to attach where, there is plenty of reference material on the internet and in the starter box itself. I'd definitely recommend finding a few good examples before beginning assembly. Also be sure to clip out the correct set of arms for your weapon choice, check and re-check the sprue description sheet that comes with the box before you do any assembly.
Once you've liberated the necessary parts from the sprue, clean them up in the usual way. Scrape the mold lines off with the hobby knife or mold line remover of your choice, sand down as necessary with a sanding stick or very fine grade sandpaper. Though be careful not to remove any detail while doing so. Of all the war gaming kits that I've assembled, the Warlord Games plastics have some of the most spindly components of the lot of them. I find this makes it very easy to break components like weapons while attempting to remove them from the sprue. To avoid this try to clip away from the model and trim down with a hobby knife once the part is off the sprue.
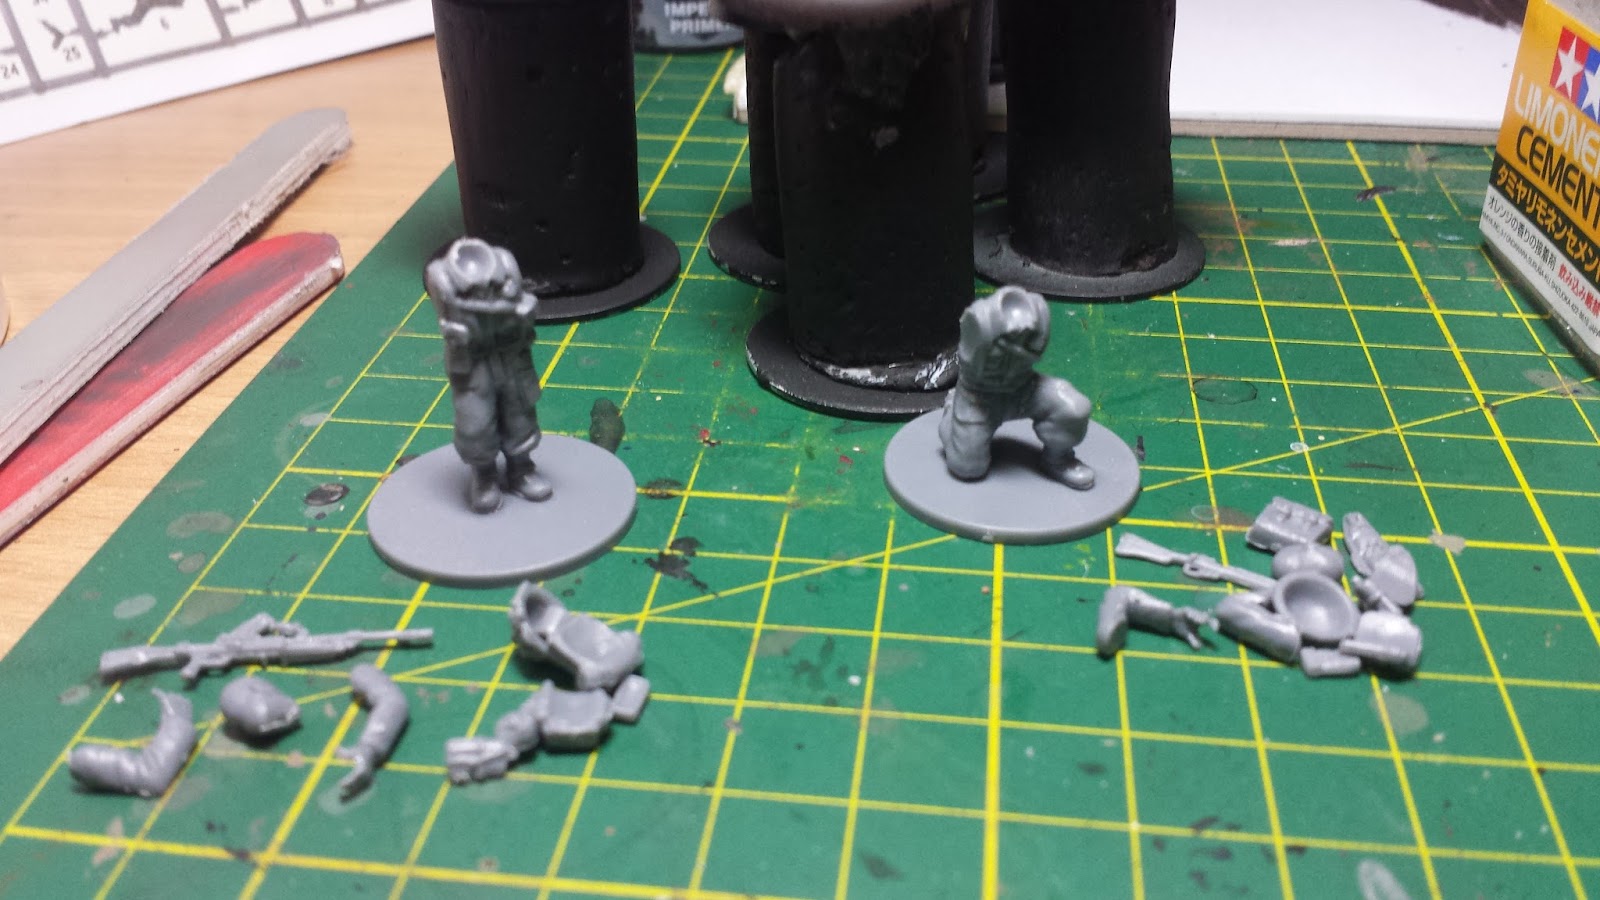
I usually start with gluing the body/torso component to the base to provide something to work off. Then the weapon arms, which can be quite hellish, as you have to test hit the weapon and the arms all before gluing. To make the best of this I recommend gluing the hand holding the weapon's trigger first while off the model. Then once the weapon / firing arm is one piece, glue that piece to the model in the pose that you want, then let the model thoroughly dry. Once an hour or so has past test fit the other arm and figure out where the figure will grip the weapon, the apply glue to that spot as well as the arm itself, then hold the other arm in place until dry.
Once the weapon arm is out of the way the belt kit should be relatively easy. The part I usually leave last is the head, as I use this point to decide where the model should be looking, either down the barrel of a raised weapon in the cast of a miniature that is firing, or looking in another direction to represent the model scanning for threats. Since the helmet is a separate piece from the head that is always the very last piece that I glue on. With the helmet I usually tilt it back slightly so that the model's eyes aren't obscured.
The very final stage is gritting up the base. My usual mixture, now that my excellent tub of old school citadel mixed grit has run out, is to first glue some cork rocks on the base with PVA glue. Once those are dry I apply two overall coats of PVA glue to the remaining clear areas and slide the base through my tub of citadel fine grain sand. This effect gives a somewhat even ground broken up by a few rocks.

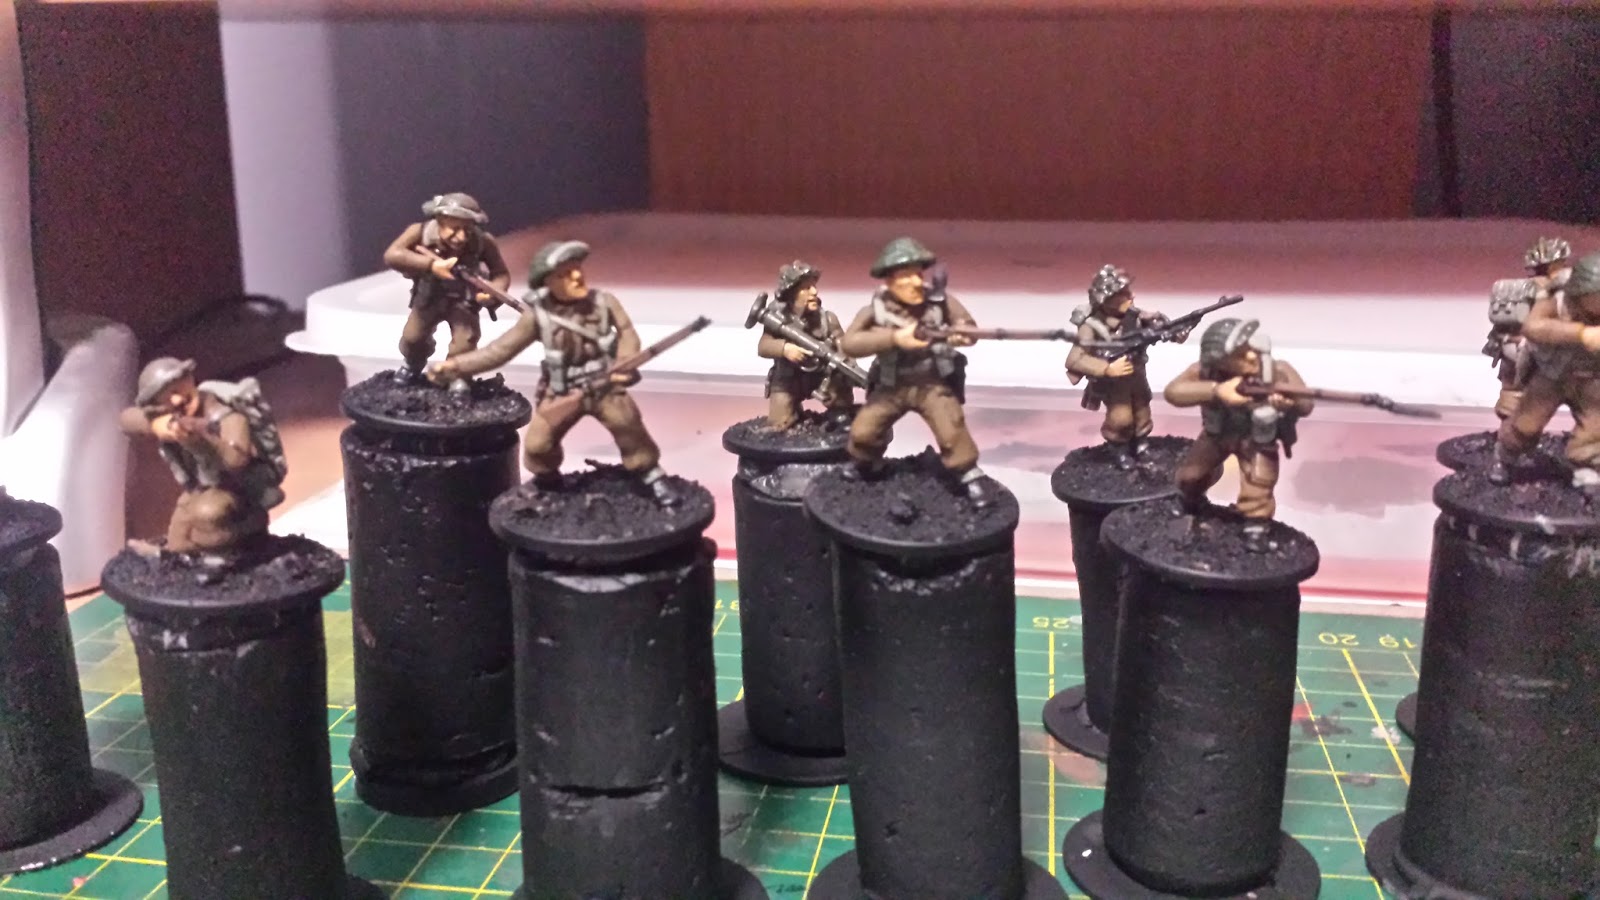
Once the PVA is dry, I attach the model to a painting stand, then undercoat with Citadel Miniatures Black Primer, though any black primer of your choice will work just as well.
Stage 2 - Base Colours
The first stage, and most time consuming by far, for batch painting is to establish your initial basecoats. Since this project uses all Vallejo paints the base coat requires at least two to three thin layers of each colour to get a solid layer. The only two instances where I do things a little differently are the helmets with netting or camouflage and the metallic components of the weapons.
All of the colours are consistent across all of the models, except for any exposed hair if there is any, in this case I recommend picking out some dark browns, reddy browns, blacks, sandy yellows. Feel free to use whatever works for you when painting hair.
Helmet Netting
Since the painted metal is a different colour from the netting use. I first put a solid base coat of the painted metal colour (Brown Violet VMC 70.887) on first, then over brush with the netting colour (Military Green VMC 70.975 and VMC Olive Green 888 mixed at a 50/50 ratio). Most of the original Colour will barely be visible once the wash goes on, but hints of the metal colour will still be there. The same is true for the heavily camouflaged helmets, except pick a few different tones of green and brown the use for the pieces of foliage.
Metallics
If you ever get the chance to handle weapons from World War 2, or see examples in person, one of the things you will notice is that the metallic parts are very black. To simulate this, while keeping the metallic finish looking metallic the base colour I use for the metallics consists of three parts Black (VMC 70.950) and one part Gunmetal Grey (VMC 70.863). This will result in a very black colour with a slight metallic sheen, perfect for weapon components.
Stage 3 - Wash
Once all of the base coats have been applied, the next stage is to apply an overall wash of Army Painter Strong Tone Ink. In this case there are two parts to the wash. The first is an overall application of colour, the next is going back in with a damp brush to soak up any excess ink as it begins to pool. The overall effect that you are going for is an even tinting of the model with a slight accumulation of darker colour in the recesses. If too much of the wash pools in these recesses it goes from tinting the colour to leaving ugly blotches of brown on the model. The application and clean up phase of this stage should be done very quickly as the wash tends to dry fairly quickly. Attempting to clean up the wash while it is halfway dry will leave ugly tide marks.
Stage 4 - Re-Layer
This stage involves restoring the original colour that we washed over in the previous step. This process should catch about 70% to 85% of the model, thought that is not a hard and fast rule. The ultimate idea of this step is to re-layer the colour in the intermediary areas that are in between the highest highlights and the shades. With this in mind you should leave the shaded basecoat in between the folds of the clothing, on the undersides of the arms and in between the legs, and under any piece of equipment that would cast some shadow.
Stage 5 - Highlights
When applying highlights in this project I prefer to use glaze medium, combined with a mix of my base colour and highlight colour to start building up highlights on the model. From this point I hit each of the highlight areas with small and smaller areas with a paint mixture that has less and less amounts of glaze medium and more of more of the highlight colour in ratio to the base colour. Eventually this will lead to an almost entirely base highlight colour as a very fine edge highlight for the very sharpest edges. There are a few highlights that don’t follow this method. The first are the helmets with camouflage and netting, the flesh, and the metallic components.
For the helmet I don’t worry about highlighting the individual colours, instead I apply an overall drybrush of Buff (VMC 70.976) and Russian Uniform (VMC 70.924) mix at a roughly fifty/fifty ratio. In the case of the metallics I make another mix of about fifty/fifty Black and Gunmetal Grey. I only apply this highlight in very small amounts only to the sharpest edges to try it get a slight metallic glint going.
For the flesh I apply highlights the same way as the regular colours, except the highlights are concentrated on the cheeks, the nose, any laugh lines around the face, the very tip of the chin if I feel it is prominent enough, and the brow ridge.
Stage 6 - Final Details
For this model I don’t usually do any further finishing details except for the eyes and the hair.
In the case of the eyes I take my usual simple wargaming eyes approach. First a mix of the base flesh colour with brown. Next a layer of Off White (VMC 70.820) in the usual almond shape of an eye, then German Grey (VMC 70.995) for the eye dot. If need be I use the base flesh shade mix, or the mix of the base flesh colour with brown to redefine the shape of the eyes as needed to keep the size of the two eyes consistent. Also try to make sure the eyes are “looking”, i.e. if the model is firing a weapon at something, make sure the eyes are positioned such that they are looking down the sights of the weapon. If a soldier has their weapon lowered and their gaze pointing elsewhere feel free to change the position of the eyes to make it look like he is looking out of his peripheral vision.
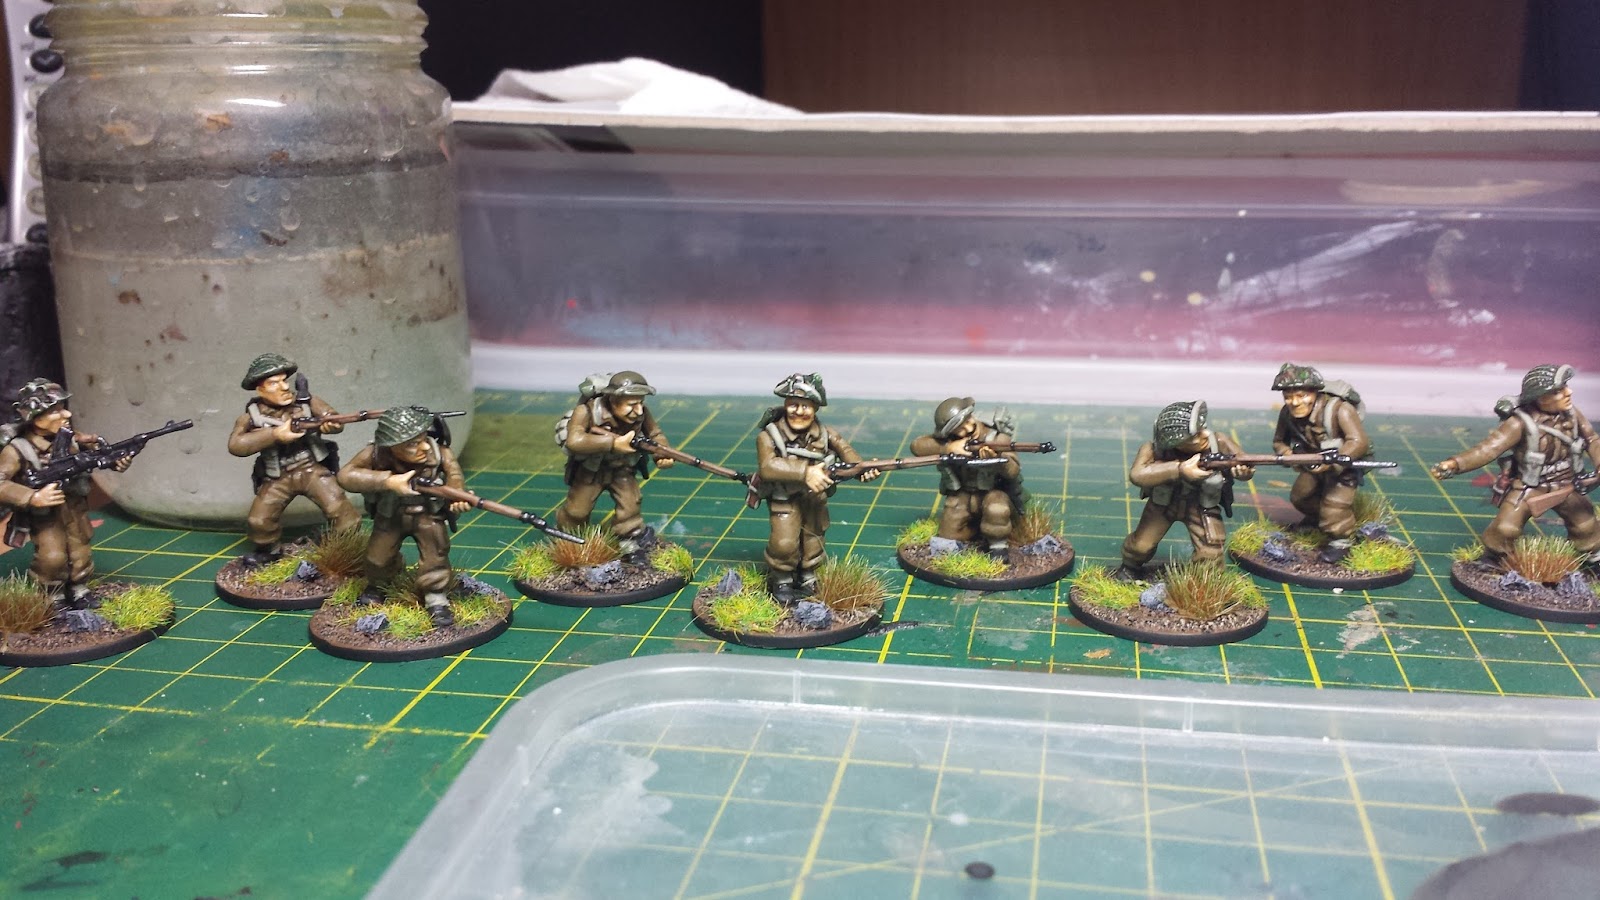
Stage 7 - Basing
For the base I follow my usual approach to doing a generic European/Woodland base. I start with a basecoat of German Camo Black Brown (VMC 70.822), an overbrushed layer of Flat Earth (VMC 70.983), and finally a very fine drybrushed layer of Dark Sand (VMC 70.847). Once that is done I start with German Grey as the base colour, overbrush with Grey Green (VMC 70.866), then a sparse drybrush of Sky Grey (VMC 70.989) on the very sharpest edges of the rocks.
Appendix - Paint List By Part / Stage
Shade for all parts - Army Painter Strong Tone Ink
Uniform Jacket / Trousers
Base - English Uniform (VMC 921)
Highlight - English Uniform (VMC 921) / Buff (VMC 70.976) at 1/1 ratio
Webbing / Belt Kit / Puttees
Base - Green Grey (VMC 70.886)
Highlight - Green Grey (VMC 70.886) / Buff (VMC 70.976) at 1/1 ratio
Gas Mask Case
Base - Olive Grey (VMC 888)
Highlight - Olive Grey (VMC 888) / Buff (VMC 70.976) at 1/1 ratio
Bayonet Scabbard / Boots
Base - Black (VMC 70.950)
Highlight - Black Grey (VMC 70.862)
Helmet (No Netting) / Grenades / Painted Metal
Base - Brown Violet (VMC 70.887)
Highlight - (Brown Violet VMC 70.887 / Buff (VMC 70.976) at 1/1 ratio
Helmet (Netting)
Base - Olive Grey (VMC 888) / Military Green (VMC 70.975) at 1/1 ratio
Highlight - Dark Sand (VMC 70.847)
Helmet (Netting and Camouflage)
Base -
Highlight -
Weapons (Wood Furniture)
Base - Olive Grey (VMC 888) / Military Green (VMC 70.975) at 1/1 ratio
Highlight - Dark Sand (VMC 70.847)
Camouflage Colours
-
Flat Brown (VMC 70.984)
-
Uniform Green (VMC 70.922)
-
German Camo Black Brown (VMC 826)
Weapons (Metallics)
Base - Black (VMC 70.950) / Gunmetal Grey (VMC 70.863) mixed at 3/1 ratio
Highlight - Black (VMC 70.950) / Gunmetal Grey (VMC 70.863) mixed at 2/1 ratio
Flesh
Base - Medium Fleshtone (VMC 70.860)
Highlight - Medium Fleshtone (VMC 70.860) / Highlight (VMC 342)
Eyes
Deep Shade - Medium Fleshtone (VMC 70.860) / Flat Brown (VMC 70.984) at 1/1 ratio
Base - Offwhite (VMC 70.820)
Pupil - German Grey (VMC 70.995)
Water Bottle
Base - Flat Brown (VMC 70.984)
Highlight - Saddle Brown (VMC 70.940)
Flat Brown (VMC 70.984)
Uniform Green (VMC 70.922)
German Camo Black Brown (VMC 826)
No comments:
Post a Comment